Making Memories
Salt dough ornaments are an easy and fun way to get your toddler involved in holiday festivities. They make great keepsakes, as well as touching gifts that any grandparent is sure to cherish. And best of all, with a little planning and patience, your toddler can do most of the work, which allows him to experience concentration, delayed gratification, and a feeling of accomplishment!

The most important thing to remember when crafting with toddlers is that the process is more important than the outcome. Breathe through the messes, laugh when things don't go according to plan, and if you feel like you have to take control, ask for a turn.
The recipe we used is very simple:
1 cup flour
1/2 cup table salt
1/2 cup water
Note: We did this activity in four parts over four days - 1) making the ornaments; 2) painting; 3) decorating; 4) inserting the ribbon
Before you start, pre-heat oven to 250F.
1. Prepare all your ingredients so your child doesn't spill the bag of flour on the floor while you're getting the water.
2. Help your child measure out the flour and salt into a bowl.
 3. Let your child stir to his heart's delight.
4. Let your child pour the water into the flour/salt mixture and stir.
5. Sprinkle some flour on your working surface and transfer the dough. If it's very sticky, sprinkle a tablespoon of flour at a time and work it into the dough until you can roll it out without it sticking.
6. Help your child make a ball and show him how to press it down with his hands. Show him how to roll out the dough with the rolling pin until it is about 1/2" thick.
7. Use cookie cutters to cut out the shapes and help your child transfer them to a cookie sheet with a spatula or your hands. (This is hard, you'll probably have to help a lot if you want any of the ornaments to look like anything more than blobs of dough.)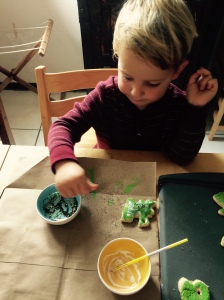
8. Use one end of a straw to poke one hole in each ornament (to string ribbon through). Or, if you're my son, poke two holes and call them "eyes".
9. Bake at 250F for 2-3 hours, then allow to cool for at least a couple of hours or overnight.
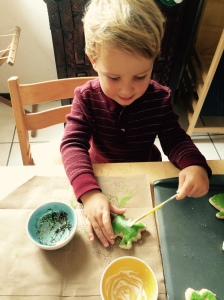
10. Put a small amount of acrylic paint (found at any craft store) in a dish and show your child how to paint the front side of each ornament. I used a piece of sponge because it doesn't pick up too much paint, but you can also use a small paint brush. Allow to dry for a few hours or overnight.
 11. Put glossy Mod Podge on one dish and glitter on another dish. Show your child how to apply the Mod Podge to an ornament with a brush, followed by a sprinkling of glitter with his fingers. Allow to dry a few hours.
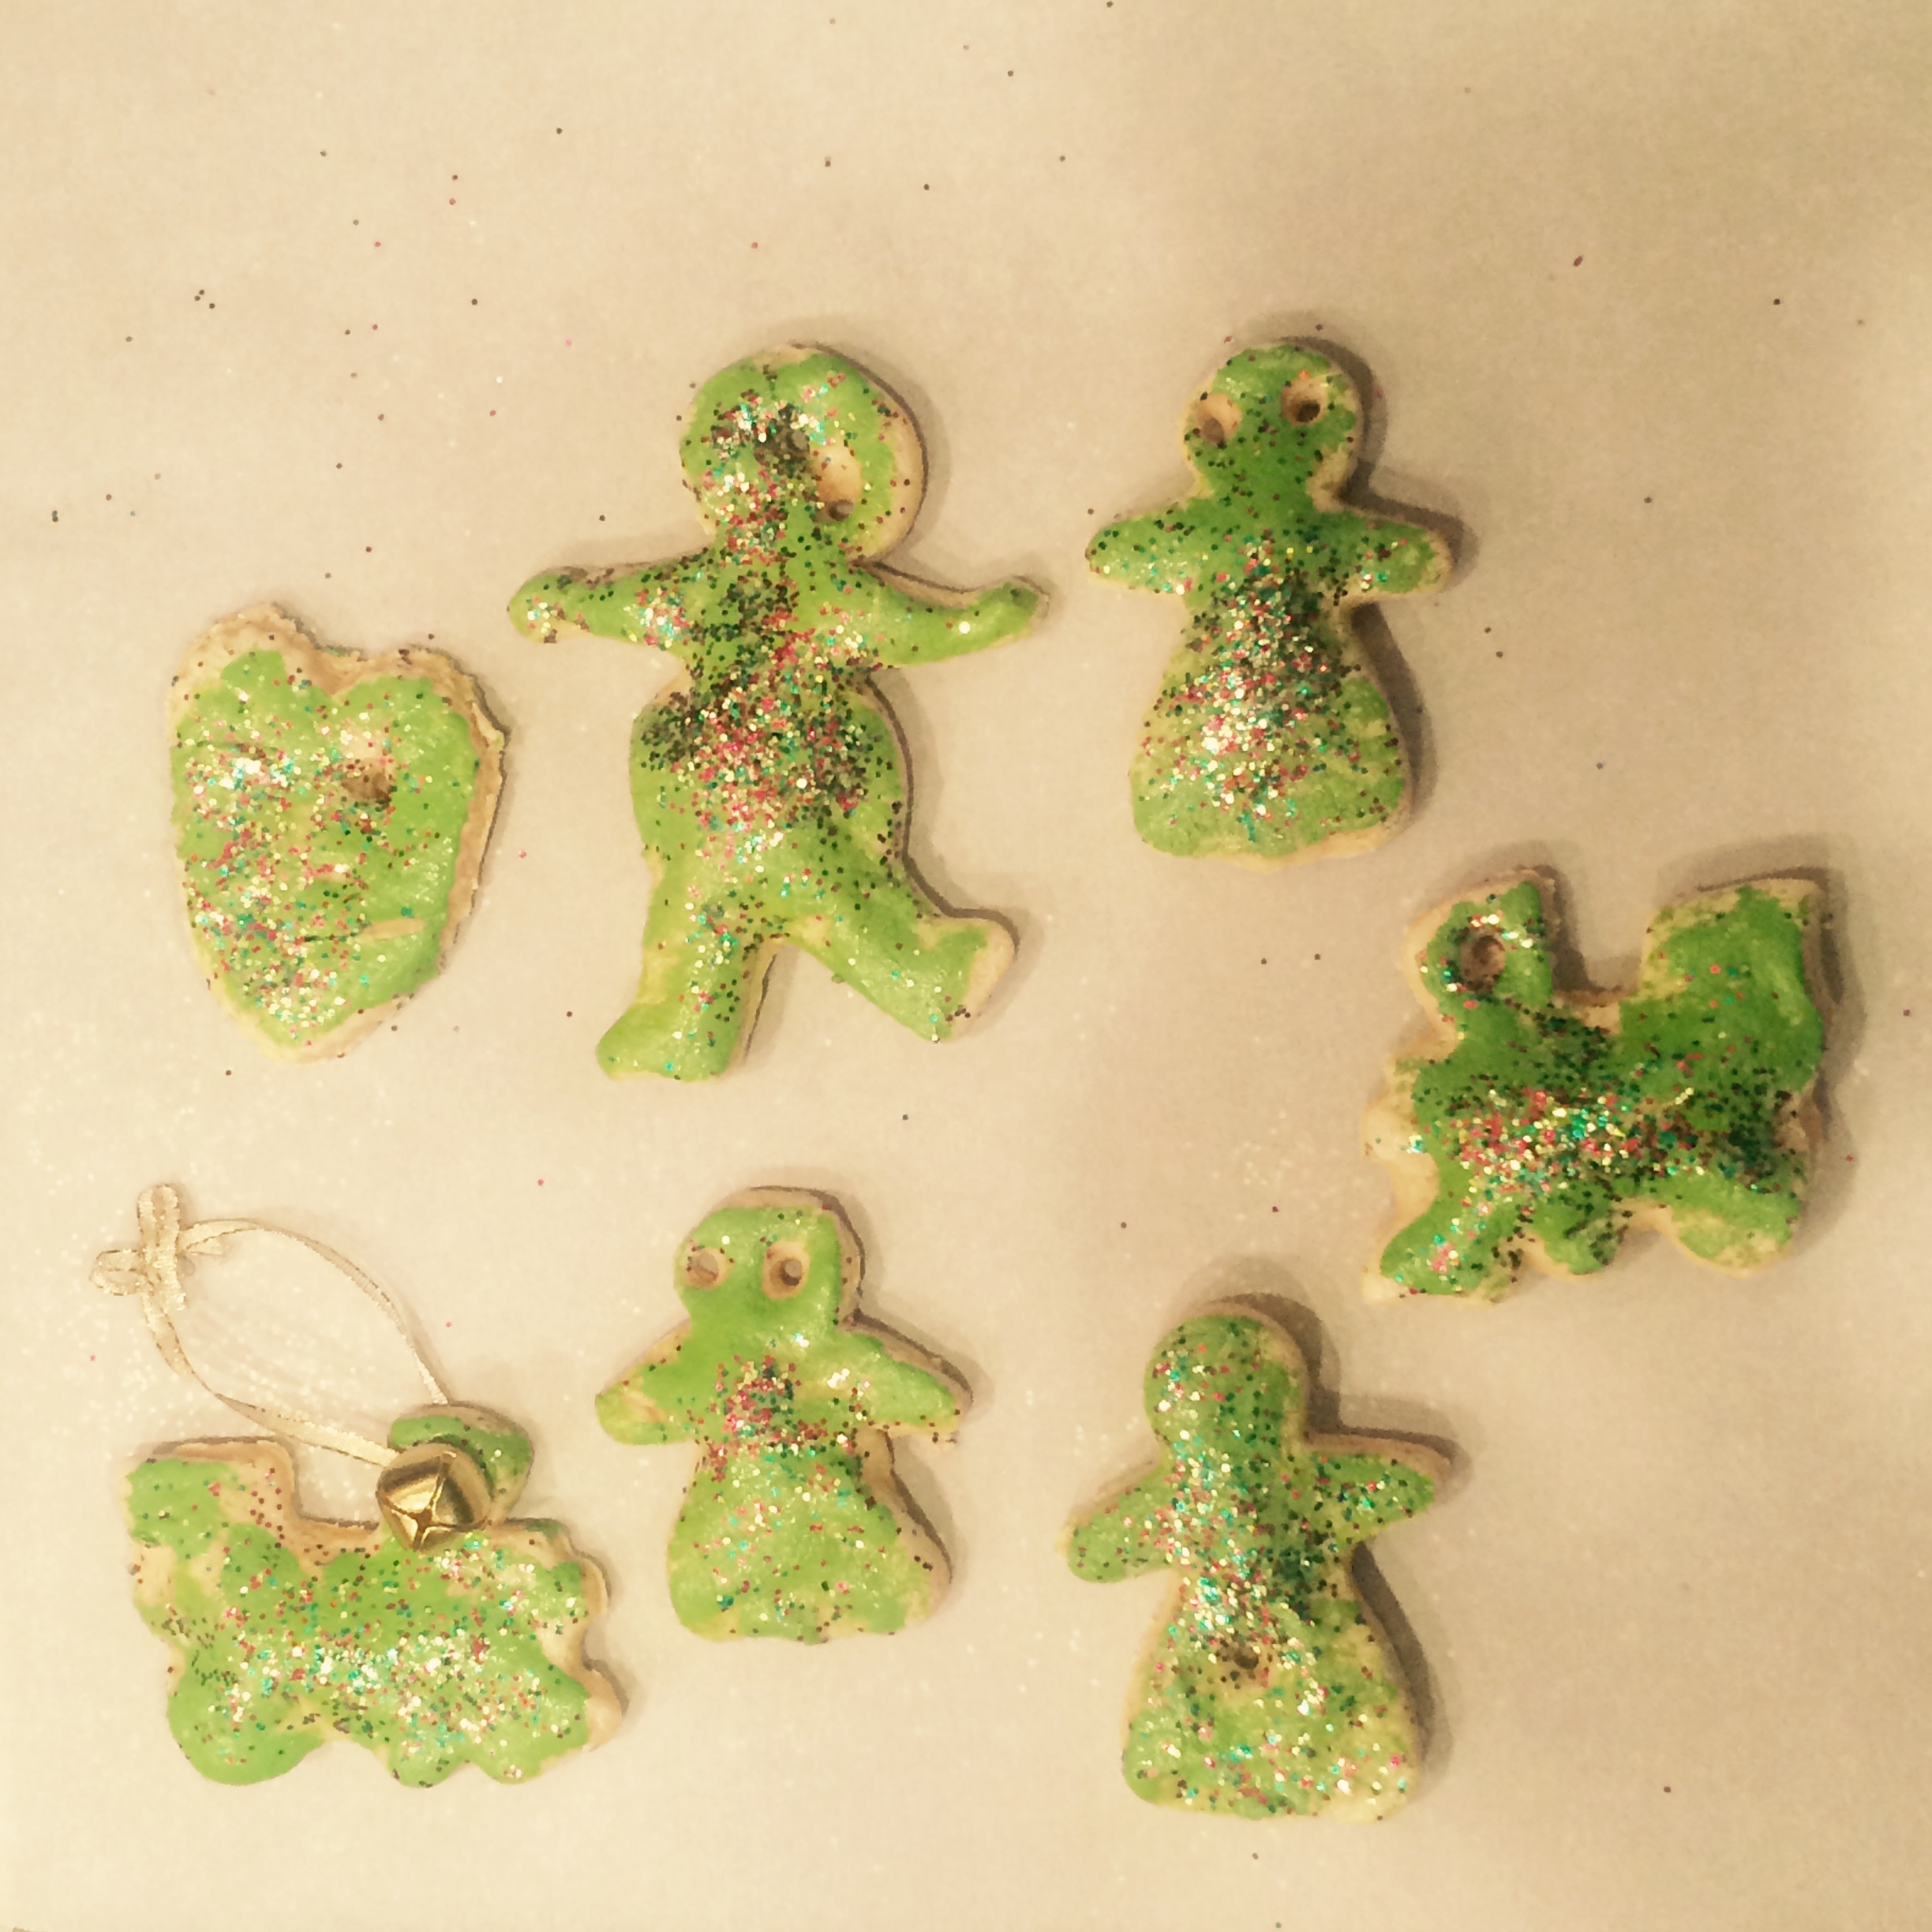
12. Apply a coat of Mod Podge to the glitter side of the ornaments to seal the glitter in. Allow to dry. Write your child's name and the year on the back of each ornament with a Sharpie, then apply a coat of Mod Podge to the back of each ornament. Allow to dry.
13. Cut a piece of ribbon about 6" long and show your child how to insert it in the hole (very thin wired ribbon works best). Optionally, you can string a small jingle bell for a festive look (and to hide the hole). Make a knot or bow.
Celebrate because you now have lovely ornaments and beautiful memories! Happy crafting!

The most important thing to remember when crafting with toddlers is that the process is more important than the outcome. Breathe through the messes, laugh when things don't go according to plan, and if you feel like you have to take control, ask for a turn.
The recipe we used is very simple:

1 cup flour
1/2 cup table salt
1/2 cup water
Note: We did this activity in four parts over four days - 1) making the ornaments; 2) painting; 3) decorating; 4) inserting the ribbon
Before you start, pre-heat oven to 250F.
1. Prepare all your ingredients so your child doesn't spill the bag of flour on the floor while you're getting the water.
2. Help your child measure out the flour and salt into a bowl.
 3. Let your child stir to his heart's delight.
4. Let your child pour the water into the flour/salt mixture and stir.
5. Sprinkle some flour on your working surface and transfer the dough. If it's very sticky, sprinkle a tablespoon of flour at a time and work it into the dough until you can roll it out without it sticking.
6. Help your child make a ball and show him how to press it down with his hands. Show him how to roll out the dough with the rolling pin until it is about 1/2" thick.
7. Use cookie cutters to cut out the shapes and help your child transfer them to a cookie sheet with a spatula or your hands. (This is hard, you'll probably have to help a lot if you want any of the ornaments to look like anything more than blobs of dough.)

8. Use one end of a straw to poke one hole in each ornament (to string ribbon through). Or, if you're my son, poke two holes and call them "eyes".
9. Bake at 250F for 2-3 hours, then allow to cool for at least a couple of hours or overnight.
10. Put a small amount of acrylic paint (found at any craft store) in a dish and show your child how to paint the front side of each ornament. I used a piece of sponge because it doesn't pick up too much paint, but you can also use a small paint brush. Allow to dry for a few hours or overnight.
 11. Put glossy Mod Podge on one dish and glitter on another dish. Show your child how to apply the Mod Podge to an ornament with a brush, followed by a sprinkling of glitter with his fingers. Allow to dry a few hours.
12. Apply a coat of Mod Podge to the glitter side of the ornaments to seal the glitter in. Allow to dry. Write your child's name and the year on the back of each ornament with a Sharpie, then apply a coat of Mod Podge to the back of each ornament. Allow to dry.
13. Cut a piece of ribbon about 6" long and show your child how to insert it in the hole (very thin wired ribbon works best). Optionally, you can string a small jingle bell for a festive look (and to hide the hole). Make a knot or bow.
Celebrate because you now have lovely ornaments and beautiful memories! Happy crafting!
Categories
- 3-6 (8)
- 6-9 (26)
- 9-12 (8)
- Positive Discipline (2)
- Conscious Parenting (12)
- Montessori Curriculum (9)
- Preparation of the Adult (14)
- Preparation of the Environment (11)
- Montessori Principles (11)
- Montessori Homeschooling (20)
- Language Arts (3)
- Math (3)
- Geography (2)
- Biology (1)
- History (2)
- Practical Life (1)
- Montessori Stories (4)
0 comments
Leave a comment